תוכנת הדמיה למעגלים חשמליים ואלקטרוניים - TINA
קרא עוד
? TINACloud – כיצד להשתמש באוסצילוסקופ הווירטואלי ב
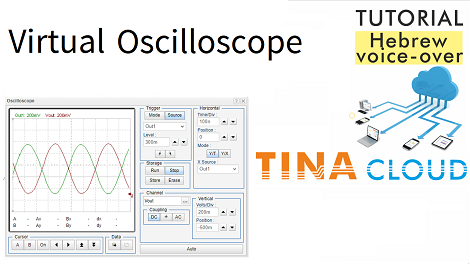
במדריך זה תוכלו ללמוד כיצד להשתמש באוסצילוסקופ הווירטואלי ב- TINACloud בשפה העברית.
אנו ננתח מעגל מתנד "Colpitts.tsc" אשר כלול בתיקייה לדוגמה של TINACloud.
חשוב לדעת כי oscilloscope מדומה הוא מאוד שימושי כאשר אתה רוצה להתאים כמה ערכי רכיבים של מעגלים קטנים רוצה לראות את ההשפעה של השינויים מיד, על מנת לכוונן את המעגל שלך.
תוכנת טינה גרסת ענן תוכנה מבית DesignSoft כלי חזק להדמיית מעגלים אלקטרוניים בסביבת תוכנה מבוקרת. היא מאפשרת תכנון מעגל, אנליזה וניתוח מעגל, מגוון בדיקות בזמן אמת עבור רכיבים אנלוגיים, דיגיטליים, מיקרו-בקרים ורכיבים רבים אשר מוגדרים בשפות תיאור חומרה כמו: VHDL, Verilog, Verilog A, Verilog AMS וגם SystemC. ניתן גם לנתח אותות RF, תקשורת, מעגלים אופטו-אלקטרוניים ויישומים מכטרוניים בעזרת ממשק תלת מימד. כוללת יכולת סימולציית תלת מימד של רכיבי המעגל, יכולת הפקת הפקת נוסחאות ומגוון כלי בדיקה (צב"ד). מאפשרת סימולציית בקרים PIC, ARM, Altera, Arduino.
ניתן להוריד גירסת ניסיון ל-30 כניסות בלשונית קבצים, פשוט להוריד לחלץ את הקבצים ולהתקין.
ראשית, פתח את הקולפיטים. tsc מתפריט 'קובץ' של TINACloud. לאחר מכן להפעיל את Oscilloscope מתפריט T&M. לאחר מכן, לחץ על לחצן הפעלה. האות Out1 מופיע. כעת, באפשרותך להשתמש בפקדים כדי להפוך את העקומה לגדולה ומפורטת יותר.
כברירת מחדל, האוסצילוסקופ נמצא במצב "אוטומטי" כלומר, מצב ריצה חופשית. לכן, נראה כיצד לקבל תמונת מצב יציבה, וכתוצאה מכך צורת הגל מתייצבת.
כמו כן נראה כיצד להעביר את האות המוצג להפעלה של קצה נופל, באופן דומה כיצד להביא את אות Vout.
בנוסף, נסביר גם כיצד ניתן לייצא את התצוגה לדיאגרמה.
לבסוף, נציג כיצד לכוונן את המעגל על ידי שינוי נגד R כך שגם Out1 וגם Vout יהיו סינוסואידיים.
To watch our tutorial please click here.
You can learn more about TINA here: www.tina.com
You can learn more about TINACloud here: www.tinacloud.com
?TINACloud – כיצד להשתמש באוסצילוסקופ הווירטואלי ב
In this tutorial you can learn about how to use the virtual oscilloscope in TINACloud in Hebrew language.
We will analyze an oscillator circuit „Colpitts.tsc” which is included in the Example folder of TINACloud.
It is important to know that the simulated oscilloscope is very useful when you want to adjust some component values of small circuits and want to see the effect of the changes immediately, in order to fine-tune your circuit.
First, open the Colpitts. tsc from the File menu of TINACloud. After that invoke the Oscilloscope from the T&M menu. Then, press the Run button. The Out1 signal appears. Now, you can use the controls to make the curve bigger and more detailed.
By default, the oscilloscope is in the “Auto” i. e., free running mode. Therefore, we will show how to get a steady state image, as a result the waveform is stabilized.
We will also show how to switch the displayed signal into Falling Edge triggering, similarly how to bring in the Vout signal.
In addition, we will also explain how you can export the display into a diagram.
Finally, we will present how to fine-tune the circuit by changing the R resistor so that both Out1 and Vout are sinusoidal.
